To set up shipping in Shopify, go to Settings > Shipping and delivery and create shipping zones for your target regions. Add flat rates, carrier-calculated rates, or custom rates for each zone. Finally, set your package sizes and fulfillment locations to ensure accurate shipping calculations.
This comprehensive guide walks you through every step of setting up shipping on your Shopify store in 2026. We’ll cover:
- Step-by-step guide: How to set up shipping on Shopify
- How to Set Up Shipping on Shopify for Dropshipping
- How to Set Up Shipping and Delivery on Shopify
- How to Change Shipping Rates on Shopify
- How to Set Up International Shipping on Shopify
- Advanced Shipping Strategies for 2026 Shopify Stores

Step-by-step guide: How to set up shipping on Shopify
Shipping configuration can make or break your Shopify store’s success. Studies consistently show that unexpected shipping costs cause up to 69% of cart abandonments, making proper shipping setup one of the most critical factors in your store’s conversion rate. In 2026, with competition fiercer than ever and customer expectations at an all-time high, getting your shipping strategy right isn’t optional – it’s essential.
When we talk about how to set up shipping on Shopify, we’re referring to the complete process of configuring shipping zones, calculating accurate rates, integrating with carriers, and establishing fulfillment rules that align perfectly with your specific business model. Whether you’re running a dropshipping operation, managing inventory from multiple locations, or scaling into international B2B wholesale markets, Shopify’s shipping framework can accommodate your needs.
>> B2B Ecommerce in 2026: What It Is and How to Start
Step 1: Access Shopify Shipping Settings and Create Shipping Zones
Before you can configure rates or connect carriers, you need to establish your shipping zones. These geographic boundaries determine where you’ll ship and form the foundation of your entire shipping strategy.
Follow these steps to create your shipping zones:
- Navigate to your Shopify admin dashboard and click on “Settings” in the bottom left corner
- Select “Shipping and delivery” from the settings menu
- Click “Create shipping zone” to begin defining your first geographic area
- Name your zone (e.g., “Domestic USA,” “EU Countries,” “International”)
- Select countries or regions by clicking “Add countries/regions” and choosing from the dropdown menu
- Add states or provinces if you need more granular control (useful for regional pricing differences)
- Save your zone and repeat the process for additional geographic areas
Your shipping zones should reflect how you think about your market. Most merchants start with at least two zones: one for domestic shipping and one for international orders. As your business grows, you might create more specific zones like “West Coast,” “EU Countries,” “Asia-Pacific,” or “Canada” to better control rates and delivery expectations.
Once you’ve established zones, you’ll assign products to them based on factors like product weight, declared value, and your inventory locations. Shopify automatically calculates the most efficient zone for each order based on the customer’s shipping address, ensuring accurate rate calculations at checkout.
If your client wants to offer free shipping on domestic orders over $500 while using USPS rates with Shopify shipping, how should you configure shipping settings?
Transform your B2B store with B2Bridge.
Discover how B2Bridge can transform your wholesale business.
Schedule a demo today to see our payment management tools in action.
Step 2: Configure Shipping Rates and Carrier Integration
With your zones established, it’s time to determine how much customers will pay for shipping. Shopify offers tremendous flexibility here, letting you choose between flat rates, carrier-calculated rates, or hybrid approaches.
Flat rates are simple fixed prices you set manually. For example, you might charge $5 for standard shipping and $15 for express shipping, regardless of package weight or destination within a zone. Flat rates work well for stores with consistent product sizes and weights, and they simplify the checkout experience.
Carrier-calculated rates pull real-time pricing directly from USPS, UPS, FedEx, DHL, and other carriers. These rates reflect actual shipping costs based on package dimensions, weight, destination, and current carrier pricing. While more complex to set up, carrier-calculated rates ensure you’re never overcharging or undercharging customers, and they automatically adjust for carrier rate changes.
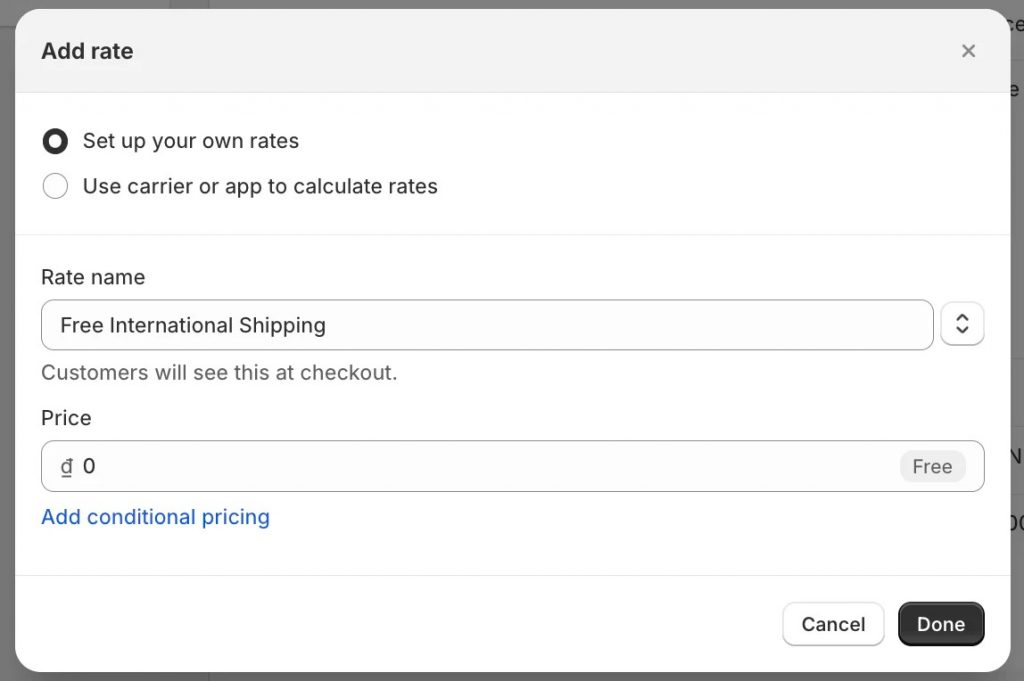
Setting up free shipping thresholds is one of the most powerful conversion tools available. Research shows that offering free shipping on orders over a certain amount can increase average order value by 20-30%. To configure this in Shopify, create a rate called “Free Shipping,” set the price to $0, and add a condition for “Based on order price” with your chosen threshold (many stores find $50-$75 to be the sweet spot).
Weight-based pricing lets you charge more for heavier items. Set up multiple rates within a zone with different weight ranges and corresponding prices. For example: 0-1 lb = $5, 1-5 lbs = $8, 5-10 lbs = $12.
Shopify Shipping vs Third-Party Apps (2026 Comparison)
| Feature | Shopify Shipping | ShipStation | EasyPost |
| Base Cost | Free (included) | From $9.99/month | Pay-per-label |
| Carrier Discounts | Up to 88% off USPS, UPS | Up to 90% off multiple carriers | Negotiated rates |
| Multi-Carrier Support | USPS, UPS, DHL Express | 40+ carriers | 100+ carriers worldwide |
| Automation Rules | Basic | Advanced workflow automation | API-driven automation |
| Best For | Small to medium stores | High-volume multi-channel | Developers & custom integrations |
Pro Tip: Don’t forget to add surcharges for special handling requirements like oversized items, hazardous materials, or remote area deliveries. These protect your margins while maintaining transparent pricing.
For stores expanding into B2B sales, remember that wholesale customers have distinct expectations around shipping. They order in larger quantities, require different carrier options, and appreciate volume-based shipping discounts. Purpose-built solutions like B2Bridge handle these complexities seamlessly, letting you serve both retail and wholesale customers expertly without compromising either experience.
Take action today – and your bottom line – will thank you.
How to Set Up Shipping on Shopify for Dropshipping
Dropshipping introduces unique shipping challenges since you don’t control fulfillment directly. Your suppliers ship products, often from different locations with varying processing times and shipping costs. Here’s how to configure Shopify shipping for dropshipping success:
Connect Your Dropshipping Apps:
- Printful automatically imports shipping rates based on product types and customer locations. Install the app, sync your products, and Printful handles rate calculation at checkout
- Oberlo (for AliExpress dropshipping) requires manual rate configuration since suppliers don’t provide APIs. Set reasonable flat rates or use estimated carrier rates
- DSers offers more automation than Oberlo, with bulk rate updates and supplier-specific shipping rules
Handle Multi-Supplier Complexity: When orders contain products from different suppliers, shipping calculations become tricky. You have three main approaches:
- Charge combined shipping by setting rules that add additional fees for each supplier’s fulfillment
- Use flat rate shipping to simplify the customer experience, then optimize supplier selection to protect margins
- Implement free shipping and build costs into product prices (many successful dropshippers use this method)
Critical Setup Steps:
- Configure realistic delivery timeframes (15-30 days for overseas suppliers) in your shipping policy
- Set up automated order routing to send orders to the correct supplier
- Enable inventory sync to prevent overselling items that suppliers have discontinued
- Create shipping profiles for different product categories with supplier-specific rates
- Test checkout flow thoroughly with various product combinations
Preventing Customer Service Issues: The biggest dropshipping complaint is slow, unclear shipping. Combat this by being transparent about delivery times, sending tracking information immediately when available, and setting up automated email sequences that keep customers informed throughout the fulfillment process.
How to Set Up Shipping and Delivery on Shopify
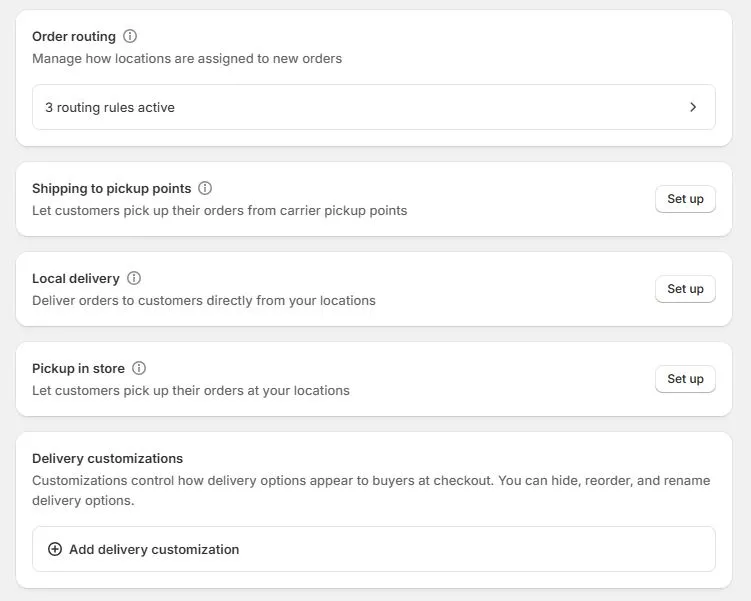
Beyond traditional shipping, Shopify supports local delivery and pickup options that can differentiate your store and improve customer satisfaction, especially for businesses with physical locations or local customer bases.
Local Delivery Configuration: Enable local delivery by creating a new shipping zone for specific ZIP codes or a radius around your business location. Set delivery fees (or offer free local delivery), configure delivery windows (e.g., “Next-day delivery for orders placed before 2 PM”), and establish minimum order values if needed. Local delivery works exceptionally well for food, furniture, plants, and other products where customers value speed and want to avoid shipping damage.
Pickup Points and Store Pickup: Activate store pickup in your shipping settings to let customers collect orders at your location. This eliminates shipping costs entirely, appeals to customers who want items immediately, and can drive foot traffic to physical stores. Configure pickup instructions, hours of availability, and whether you’ll send a “ready for pickup” notification.
Scheduled Deliveries: For businesses offering white-glove service or scheduled installations, use apps like “Store Pickup + Delivery” or “Zapier” to let customers choose specific delivery dates and time windows during checkout.
Essential Delivery Settings:
- Cutoff times: Specify deadlines for same-day or next-day processing (e.g., “Orders placed before 3 PM EST ship today”)
- Delivery windows: Offer morning or afternoon slots for local delivery
- Customer notifications: Configure automated emails when orders are out for delivery
- Order tracking integration: Connect AfterShip, Shopify Flow, or carrier tracking pages so customers can monitor shipments in real-time
These delivery options significantly reduce cart abandonment for local customers and create competitive advantages against pure-play online retailers who can’t offer immediate gratification.
How to Change Shipping Rates on Shopify
Markets change, carriers increase prices, and your business evolves. You’ll need to update shipping rates periodically to maintain healthy margins while staying competitive.
To edit existing shipping rates:
- Go to Settings > Shipping and delivery
- Click the zone containing the rate you want to modify
- Find the rate and click the “…” menu, then select “Edit rate”
- Adjust the price, conditions, or name
- Click “Done” and then “Save” to apply changes
Adding Tiered Shipping Rates: Create multiple rate options within a single zone to give customers choices. For example, offer Standard (5-7 days, $5.99), Expedited (2-3 days, $12.99), and Overnight ($29.99). Customers appreciate having options, and some will voluntarily pay more for faster service.
Adjusting for 2026 Inflation: Carrier rates increased an average of 5.9% in 2026, and fuel surcharges remain volatile. Review your rates quarterly and adjust accordingly. If you’re absorbing shipping costs through free shipping thresholds, consider raising the threshold slightly to offset increased carrier fees.
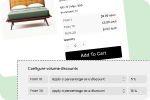
Wholesale Shipping Trend: Volume Discounts for B2B: A major 2026 trend is implementing volume-discounted shipping for wholesale customers. B2B buyers expect better shipping rates when ordering in bulk, and offering free freight on orders over $3,000-$5,000 has become standard practice. To implement this:
- Create a separate customer tag or metafield for wholesale buyers
- Set up wholesale-specific shipping rates with higher free shipping thresholds
- Use apps like B2Bridge to automatically show wholesale shipping rates only to approved B2B customers
- Consider flat-rate freight for very large orders to simplify logistics
Real-Time Rate Updates: If using carrier-calculated rates, they update automatically. For flat rates, monitor your actual shipping costs monthly. If you’re consistently paying $2 more than you’re charging, your margins suffer. Conversely, overcharging by $5+ increases cart abandonment. The sweet spot is breaking even or adding a small handling fee ($1-2) while remaining competitive.
How to Set Up International Shipping on Shopify
Expanding internationally can double or triple your addressable market, but international shipping requires careful configuration to avoid customer confusion and compliance issues.
Activate Shopify Markets: Shopify Markets is your command center for international commerce. Navigate to Settings > Markets to create country-specific storefronts. For each market, you’ll configure:
- Duties and taxes: Choose whether to collect these at checkout (DDP – Delivered Duty Paid) or let customers pay on delivery (DDU – Delivered Duty Unpaid). DDP creates better customer experiences and reduces delivery rejections
- HS codes: Harmonized System codes classify products for customs. Shopify helps you assign these, and accurate codes prevent shipments from being held at customs
- Currency: Display prices and collect payment in local currencies to increase international conversion rates
- Language: Translate product descriptions and checkout for each market
Multi-Currency Shipping Displays: When customers see prices in their local currency, including shipping, conversion rates improve by 20-40%. Shopify Markets handles currency conversion automatically, but verify that shipping rates display correctly in each currency during checkout testing.
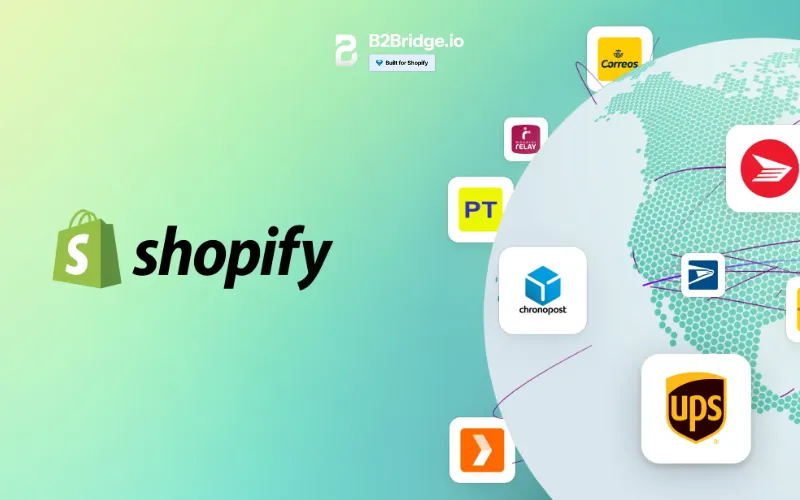
Localized Carrier Options: Different regions prefer different carriers. While DHL and FedEx work globally, consider adding regional specialists:
- Europe: DPD, Hermes, Royal Mail
- Asia-Pacific: Japan Post, SF Express, Australia Post
- Latin America: Correos, Estafeta
International Compliance Checklist:
✓ Verify restricted items for each destination country (batteries, cosmetics, supplements have varying regulations)
✓ Complete commercial invoices with accurate product descriptions and values
✓ Add insurance to shipments over $200 to protect against loss or damage
✓ Include return shipping information and policies for international customers
✓ Set realistic delivery timeframes (10-30 days depending on destination and service level)
✓ Configure customs paperwork automation through your carrier or app like EasyShip
✓ Test checkout flow from IP addresses in target countries
Pro Tip: Start with 2-3 international markets where you see existing demand (check Analytics > Reports > Sales by location) rather than enabling all countries at once. This lets you refine your process before scaling globally.
Advanced Shipping Strategies for 2026 Shopify Stores
Once you’ve mastered the fundamentals, these advanced strategies can significantly improve operational efficiency and customer satisfaction:
Dynamic Conditional Logic: Use Shopify Scripts or apps like “Advanced Shipping Rules” to create complex rate calculations:
- Hide expensive overnight shipping for customers who’ve never used it before
- Offer free shipping only to repeat customers or those in your loyalty program
- Apply automatic discounts to shipping for specific product collections
- Show B2B rates only to logged-in wholesale customers
- Add insurance automatically to orders over $500
Multi-Location Fulfillment Optimization: If you stock inventory in multiple warehouses or use 3PL partners, configure Shopify’s multi-location inventory system to:
- Automatically route orders to the fulfillment center closest to the customer
- Split shipments when products come from different locations (and communicate this clearly)
- Show accurate delivery estimates based on the actual fulfillment location
- Balance inventory across locations to minimize shipping distances
B2B Shipping Customization: Wholesale customers have different expectations than retail shoppers. They often:
- Prefer freight carriers for large orders over parcel carriers
- Need commercial addresses and loading dock requirements specified
- Expect negotiated rates or free shipping at higher thresholds
- Require precise delivery scheduling to coordinate receiving departments
Apps like B2Bridge simplify B2B shipping management by creating separate experiences for wholesale customers, including custom shipping rules, negotiated rate displays, and freight options that don’t appear for retail customers.
Split Testing Shipping Displays: A/B test how you present shipping information:
- Show free shipping progress bars (“Add $15 more to your cart for free shipping!”)
- Display estimated delivery dates vs. speed tiers (“Arrives by Friday” vs. “2-day shipping”)
- Test flat rate vs. carrier-calculated rate acceptance
- Experiment with shipping cost visibility on product pages vs. only at checkout
Minor changes to how you present shipping can have dramatic effects on conversion rates. One merchant testing revealed that showing “Free shipping on orders over $75” instead of “Shipping calculated at checkout” increased conversions by 18%.
Measuring Shipping Performance and Optimization
You can’t improve what you don’t measure. Track these key performance indicators monthly to optimize your shipping strategy:
Shipping KPI Dashboard
| Metric | Target Range | How to Calculate | Why It Matters |
| Cost per Order | 8-12% of AOV | Total shipping costs ÷ Number of orders | Protects margins while staying competitive |
| Average Delivery Time | 3-5 days domestic | Sum of delivery days ÷ Total orders | Impacts customer satisfaction and reviews |
| Cart Abandonment at Shipping | Below 15% | (Abandoned at shipping ÷ Total carts) × 100 | Identifies pricing or presentation issues |
| International Conversion Rate | 1-3% | International orders ÷ International sessions | Measures international strategy effectiveness |
| Shipping Revenue Coverage | 80-100% | Collected shipping fees ÷ Actual costs | Determines if you’re subsidizing shipping too much |
A/B Testing Shipping Displays: Run controlled experiments changing one variable at a time:
- Week 1: Free shipping bar visible on all pages
- Week 2: Free shipping bar only on cart page
- Week 3: No free shipping bar, threshold mentioned in header
- Measure: Conversion rate, average order value, and revenue per session
Even subtle changes like moving the free shipping announcement from the header to a sticky banner can shift behavior significantly.
Common Shipping Pitfalls to Avoid:
Overcharging International Customers: Nothing kills international sales faster than $40 shipping on a $30 product. If carrier rates are prohibitive, consider slower economy services, regional fulfillment centers, or building shipping into product pricing for key markets.
Ignoring Wholesale Minimum Orders: B2B customers expect volume benefits. If your wholesale pricing is good but shipping stays the same as retail, you’re leaving money on the table. Implement tiered shipping rates or free freight thresholds for wholesale orders.
Inaccurate Delivery Estimates: Under-promising and over-delivering delights customers. Over-promising and under-delivering destroys trust. Build buffer time into your estimates, especially during peak seasons.
No Packaging Optimization: Reducing package dimensions by even one inch can drop you into a lower carrier pricing tier. Audit your packaging quarterly and invest in right-sized boxes.
Case Study: Shopify Store Cut Shipping Costs 35% with Wholesale Optimization
The Challenge: A home goods wholesaler was experiencing rapid growth in their B2B channel but struggled with shipping economics. They were processing 200+ wholesale orders monthly, but shipping costs were eating 18% of their margins. Their retail and wholesale customers saw identical shipping rates, and they were manually negotiating freight quotes for large orders, creating fulfillment delays.
The Solution: The merchant implemented a three-part shipping optimization strategy:
- Tiered Rate Structure: Created volume-based shipping rates with free freight on orders over $5,000, discounted rates for orders $2,000-$5,000, and standard rates below $2,000
- B2B-Specific Rates: Used B2Bridge to show wholesale customers different shipping options than retail shoppers, including freight carrier integrations for large orders
- Automated Rate Calculation: Eliminated manual quoting by setting up carrier accounts with negotiated rates that calculated automatically at checkout
The Results (6-Month Period):
- 35% reduction in per-order shipping costs through negotiated carrier rates and volume consolidation
- 25% conversion rate increase among wholesale customers due to transparent, competitive shipping at checkout
- 40% growth in international B2B orders after implementing DDP (duties/taxes paid) checkout
- 12 hours per week saved eliminating manual shipping quotes and calculations
- Average order value increased from $1,850 to $2,650 as customers added products to reach free shipping thresholds
Key Takeaways:
The success came from recognizing that wholesale customers have fundamentally different shipping needs than retail customers. By segmenting the experience and optimizing for each audience, the merchant improved both customer satisfaction and profitability. The automation eliminated bottlenecks that were preventing scaling, and transparent pricing at checkout removed friction from the buying process.
For dropshippers and scaling stores, the lesson is clear: as your business model becomes more sophisticated, your shipping strategy must evolve accordingly. What works at 50 orders per month creates problems at 500 orders per month.
Why B2Bridge Perfects Your Shopify Shipping + Wholesale Setup
Setting up shipping correctly is crucial, but managing B2B and B2C customers simultaneously adds another layer of complexity. This is where B2Bridge transforms your operations:
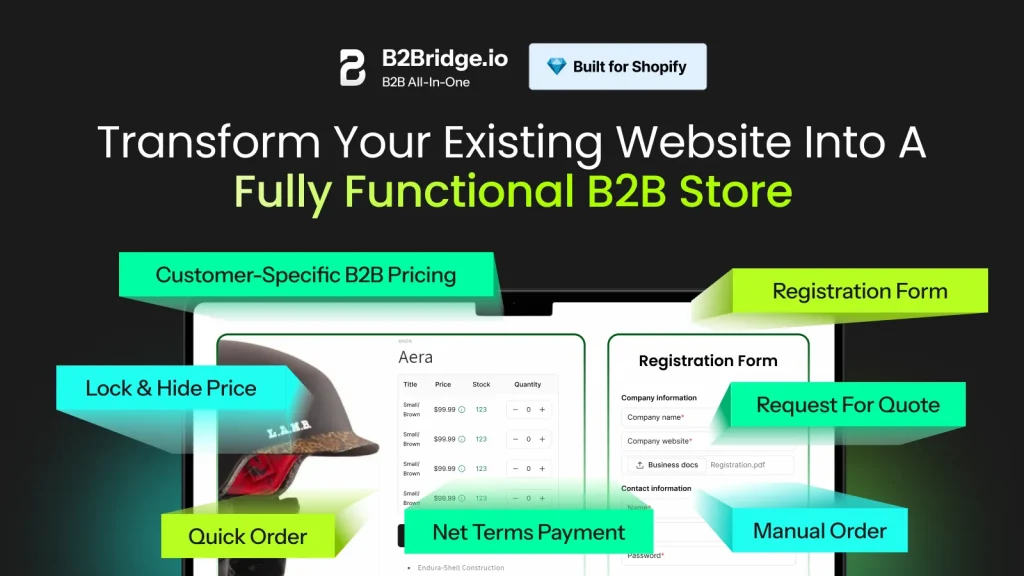
Simplify Wholesale Management
Run your B2B channel as smoothly as B2C with B2Bridge’s comprehensive wholesale platform. Configure separate shipping rules, rates, and carriers for wholesale customers without affecting your retail experience.
Protect Your Pricing Strategy
Hide wholesale prices and shipping rates from retail shoppers automatically. B2Bridge ensures the right customers see the right prices – including shipping costs – based on their customer tags or login status.
Scale with Confidence
Grow your B2B channel without drowning in spreadsheets or manual processes. B2Bridge handles everything from customer registration and approval to tiered shipping rates and bulk order management.
Save Time on Operations
Automate wholesale customer registration, custom price lists (including shipping), minimum order quantities, and payment terms. Focus on growing your business instead of managing administrative tasks.
Offer a Seamless Buyer Experience
Give B2B buyers the self-serve shopping experience they expect, complete with quick reordering, custom shipping options, and freight quotes integrated directly into checkout.
Close More Wholesale Deals
Turn quote requests into completed orders with built-in RFQ (Request for Quote) tools, including negotiable shipping rates for large orders.
Future-Proof Your Store
As your wholesale business grows, B2Bridge adapts with you. No need for multiple apps or complicated integrations – one platform handles your entire B2B operation, including sophisticated shipping scenarios.
FAQs: Shopify Shipping Setup [2026 Edition]
To set up shipping in Shopify, go to Settings > Shipping and delivery, create shipping zones for the regions you ship to, and add rates such as flat, free, or carrier-calculated options. Configure package details and fulfillment locations to ensure accurate shipping costs.
On your Shopify website, open Settings > Shipping and delivery, then define shipping zones based on countries or regions. Add shipping rates for each zone and select your preferred carriers or methods. Finish by entering package dimensions and assigning fulfillment locations.
Set shipping and delivery by navigating to Settings > Shipping and delivery, creating zones, and adding rates for each region. You can enable local delivery or pickup if needed. Ensure package sizes, weights, and fulfillment centers are configured to calculate accurate rates.
As a Shopify seller, shipping is handled through customizable zones and rates you set in your admin. Shopify can calculate rates automatically using carriers or follow your flat-rate rules. Once an order is placed, you purchase labels, fulfill items, and track shipments through the dashboard.
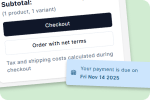
Yes, through several methods. The most robust solution is using an app like B2Bridge that creates separate shopping experiences for B2B customers, including custom shipping rates, free freight thresholds, and freight carrier options. Alternatively, use Shopify customer tags combined with shipping scripts (requires Shopify Plus) or apps like “Wholesale Pricing Discount” that extend to shipping rates. Tag wholesale customers, then create conditional shipping rules that apply only to tagged customers.
For small businesses that want to add B2B features to Shopify without the cost of Shopify Plus, affordable third-party apps offer key tools such as wholesale pricing, customer tagging, and custom registration forms.
Conclusion
Shipping setup on Shopify might seem daunting initially, but approaching it systematically – as we’ve outlined in this guide. Start with the basics, test and measure continuously, and don’t hesitate to invest in tools that eliminate friction and save time.
Ready to optimize your Shopify shipping and scale your wholesale business? Explore B2Bridge and discover how the right tools can transform your B2B operations while perfecting your shipping strategy.
Hi, I’m Ha My Phan – an ever-curious digital marketer crafting growth strategies for Shopify apps since 2018. I blend language, logic, and user insight to make things convert. Strategy is my second nature. Learning is my habit. And building things that actually work for people? That’s my favorite kind of win.